|
HTML HTML5 HTMLタグ スマートフォン |
CSS CSSプロパティ CSS・HTML便利ツール |
HTML色見本 配色組み合わせツール 特殊文字 |
JAVA Android |
PHP Smarty修飾子 EXCEL |
ボタン(Button)を使用するには
TOP > Androidアプリ開発日誌 >
ボタン(Button)を使用するには
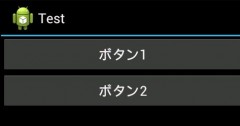
ボタン(Button)のサンプルソースと解説(Android)
 android.widget パッケージの Button クラスを使用します。
ソース「 /src/jp.mediawing.android.test/TestActivity.java 」
package jp.mediawing.android.test;

import android.app.Activity;
import android.os.Bundle;
import android.view.View;
import android.widget.Button;
import android.widget.Toast;

public class TestActivity extends Activity {
    @Override
    public void onCreate(Bundle savedInstanceState) {
        super.onCreate(savedInstanceState);
        setContentView(R.layout.main);

        Button btn1 = (Button) findViewById(R.id.button1);
        // ボタン1がクリックされた時の動作を実装
        btn1.setOnClickListener(new View.OnClickListener() {
            @Override
            public void onClick(View v) {
                Button button = (Button) v;
                Toast.makeText(TestActivity.this, "ボタン1 click",
                        Toast.LENGTH_SHORT).show();
            }
        });

        Button btn2 = (Button) findViewById(R.id.button2);
        // ボタン2がクリックされた時の動作を実装
        btn2.setOnClickListener(new View.OnClickListener() {
            @Override
            public void onClick(View v) {
                Button button = (Button) v;
                Toast.makeText(TestActivity.this, "ボタン2 click",
                        Toast.LENGTH_SHORT).show();
            }
        });
    }
}
レイアウトファイル「 /res/layout/main.xml 」
<?xml version="1.0" encoding="utf-8"?>
<LinearLayout xmlns:android="http://schemas.android.com/apk/res/android"
    android:orientation="vertical"
    android:layout_width="fill_parent"
    android:layout_height="fill_parent">

    <Button android:id="@+id/button1"
        android:layout_width="fill_parent"
        android:layout_height="wrap_content"
        android:text="ボタン1" />
    <Button android:id="@+id/button2"
        android:layout_width="fill_parent"
        android:layout_height="wrap_content"
        android:text="ボタン2" />

</LinearLayout>
